
Since the outbreak of the Coronavirus (COVID-19) I’ve been working from home. I have a little daughter (age 5) who also had to stay home from school, so more than once I had the same situation as Professor Robert Kelly during a BBC interview:
Since I recently bought and build a 3D printer (Prusa i3 MK3S) and watched Scott Hanselman change his lights during his talk on Microsoft Build 2020, I put 1 and 1 together and decided to try and create something for myself/daughter. My goal was to create a led-light, that I can put on the wall besides my office door, that changes color following my Microsoft Teams presence status (since that’s the tool I use for meetings/video-calls all day).
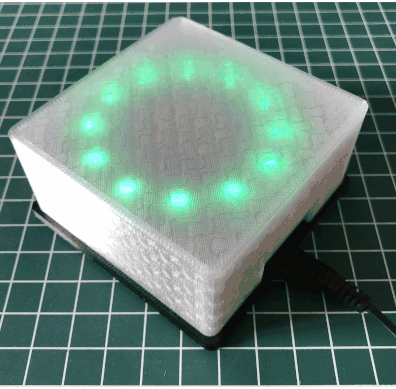
The end result after 3 nights of tinkering looks like this:
The hardware side is made from:
| Part name | Cost (incl. shipping) |
|---|---|
| ESP32 DevKit v1 | €4,33 |
| X-Ring WS2812b RGB-led-ring 12 leds or this on AliExpress | €2,35 |
| 9.7m of black PETG filament for the base (€19,92 for 300m) | €0.65 |
| 10.5m of transparant PETG filament for the shell (€19.52 for 300m) | €0.68 |
| 3 female-to-female DuPont jumper wires (€1.09 for 40pcs) | €0.08 |
| (old) phone charger with mini-USB connector (0.7A at 5V) | - |
| Total: €8,09 |
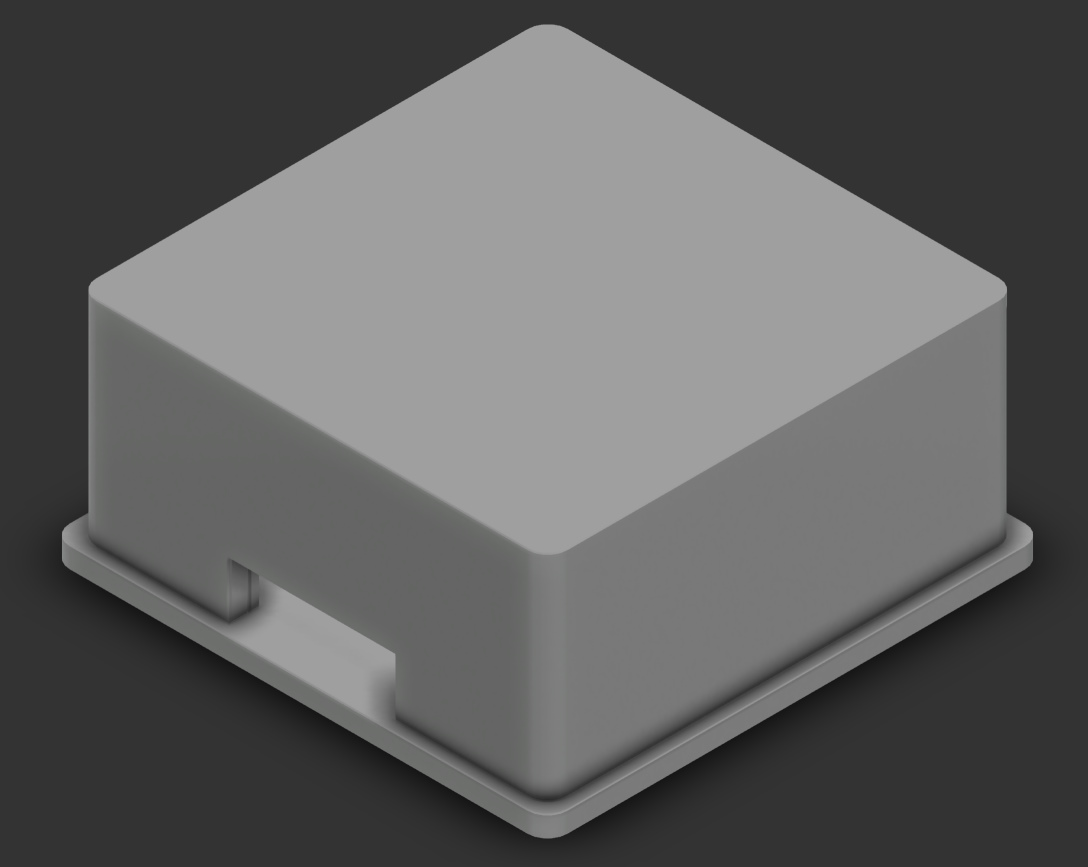
The filament is used to print a custom designed case, which consists of 2 pieces that hold the ESP32 and the RGB-led-ring. They slide nicely over each other and lock together at the USB opening. The case can be viewed/downloaded at Autodesk Fusion 360 - Team Presence Light or Thingiverse - Teams Presence Led.
The software on the ESP32 is ESPHome and configured with a relatively easy script:
esphome:
  name: teams_presence_led
  platform: ESP32
  board: esp32doit-devkit-v1
  on_boot:
    then:
      - light.turn_off: xringid

wifi:
  ssid: !secret wifi_ssid
  password: !secret wifi_password

  ap:
    ssid: "Teams Presence Led"
    password: !secret wifi_hotspot_password

captive_portal:

logger:

api:

ota:

web_server:
  port: 80

light:
  - platform: neopixelbus
    type: RGB
    pin: GPIO26 #D26
    num_leds: 12
    variant: WS2812
    method: ESP32_I2S_1
    name: "xringname"
    id: "xringid"
The script is also available on my GitHub repo for this project.
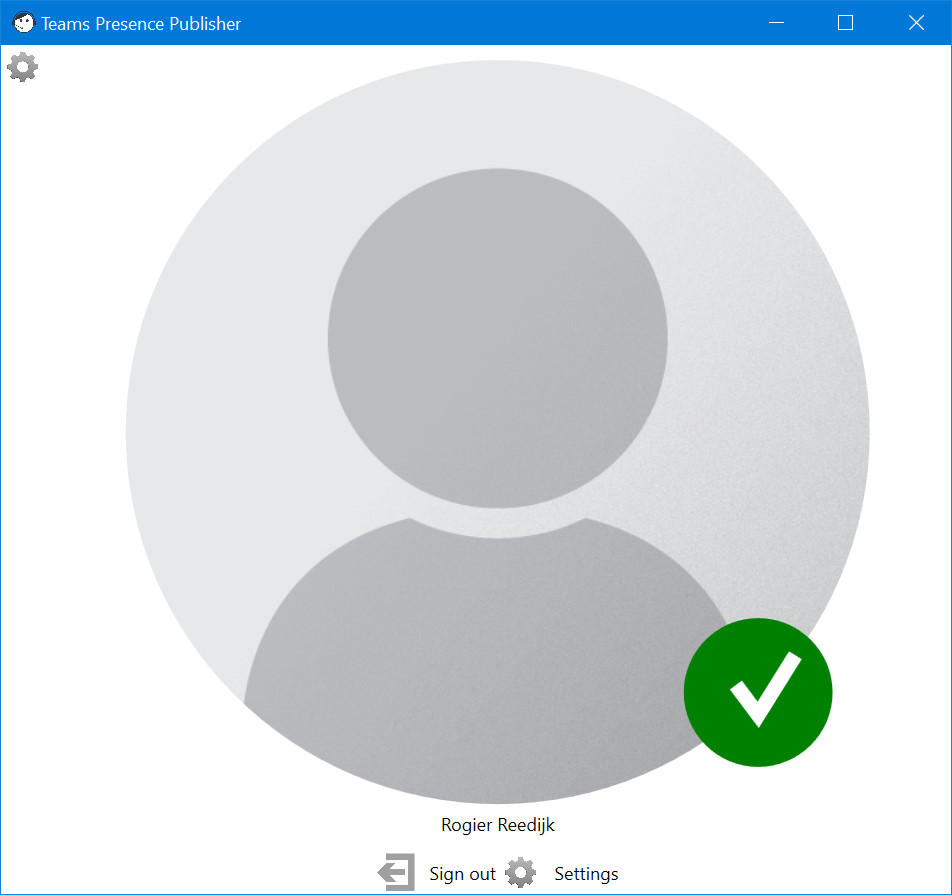
The above hardware isn’t able to determine the Microsoft Teams presence by itself, it needs a companion app running on a Windows machine. I’ve created an very minimalistic Windows application using C# and WPF which polls the Microsoft Graph API every 15 seconds for the presence of the signed in user. Based on the presence it will sent a message to the ESPHome API to change the color of the leds.
The app also has the ability to publish your Microsoft Teams status to MQTT. I haven’t extensively tested this feature, but I’m going to use it in the future with Home Assistant to also light up the led at night, as a night-light for my daughter.
If you want to re-create this project, head on over to my GitHub repo MicrosoftTeamsPresenceLed. There you can find all source-code, stl-files and the configuration script I used.
Future plans/possible improvements:
- make the case smaller/less high (less printing/less weight)
- try to downgrade the processor to an ESP8266 (cheaper)
- use less leds, maybe one (?), and test how long this can run on a battery
- add motion sensor to only light up when movement is detected
- reprint shell with different filament/settings to create a diffuser style shell
- improve UI of companion app
- make color configurable from companion app
- and more…
Special thanks go out to:
- Scott Hanselman for sparking the initial idea and his blogpost
- Isaac Levin for creating a very similar UWP app using off the shelve smart lightbulbs (LIFX and Philips Hue).
- ESPHome for their super easy and powerfull ESP software.
- EzGif.com for creating the nice animated gif used in this blog.
1 replies on “DIY Microsoft Teams presence led”
Really fun to Google for exactly this and then stumble upon your Blogpost, Rogier. I’m still new to 3d printing and electronics projects so this might be a little complicated, but nice post!!
Your reply